|
|
TOYOT Restoration
Bottom job w/blisters, Topsides (Hull) & Mast refinishing
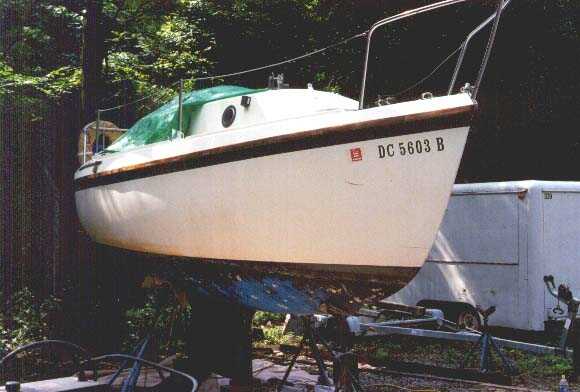
| TOYOT (Toy Yacht) is a 1969
Westerly Cirrus, hull #9674, sail number 222. I bought her back in July of 1998. I learned
to sail the summer of 1997.
I finally got the time and determination in the late summer of 2000 to get her hauled out and tackle some major work to give her a facelift.
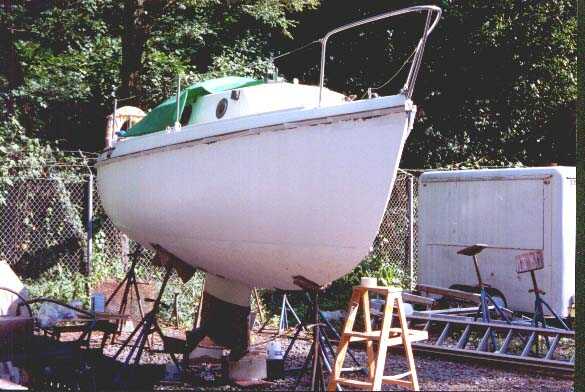
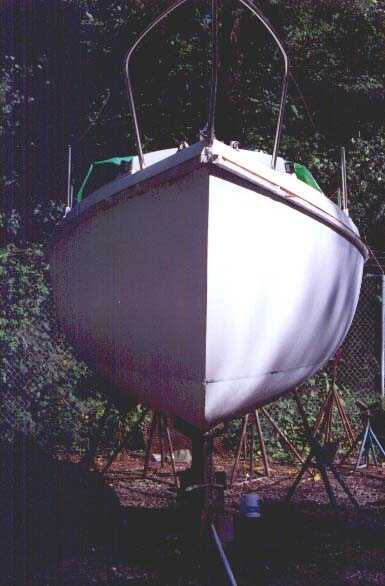
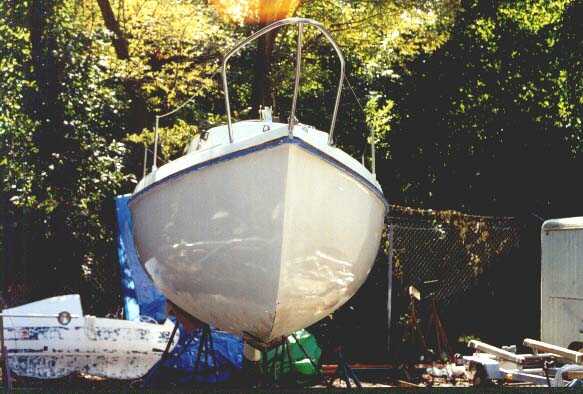
The Goals The gelcoat was heavily oxidized and no amount of polish would bring it back. It also had some crazing and porosity. The straw that broke the camel's back and forced me to paint her was a large patch job on the port side of the hull that was done by a previous owner. The repair looked like a lot like spackle and had never been sanded, much less faired. It was also white and the rest of the fiberglass was a creamish tan color similar to what Island Packet uses.
The desire to fix the repair to the topsides (the hull above the waterline is called the topsides, not to be confused with the deck), have it fair, and one color dictated it was painting time vs. trying to bring back the gelcoat. Two of the seacocks were seized, and two through hulls had gate valves which are of course a no-no on a boat. Gate valves are like those on a home outdoor water spigot. There is no way to know the valve is actually closed. One just spins the handle till it stops. If the valve sticks or has flotsam blocking the gate one can be fooled into thinking it's closed when it isn't. Very unsafe idea for a below the waterline through hull. Correct shut off valves for marine use have a handle that rotates through 90 degrees and the handle position clearly confirms the state of the valve and I wanted to correct all these shortcomings.
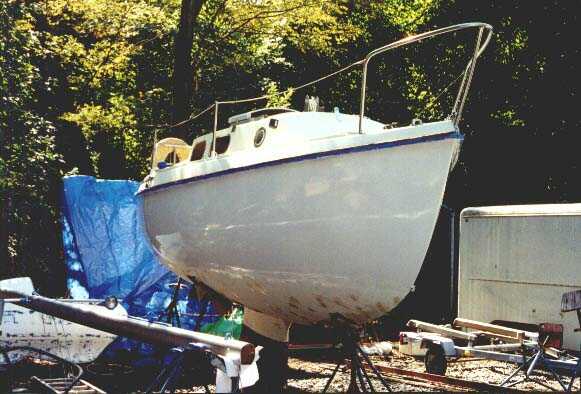
The mast and boom were anodized a gold color. Much of that was worn off leaving the mast a combination of gold, silver, and black/gray oxidation.
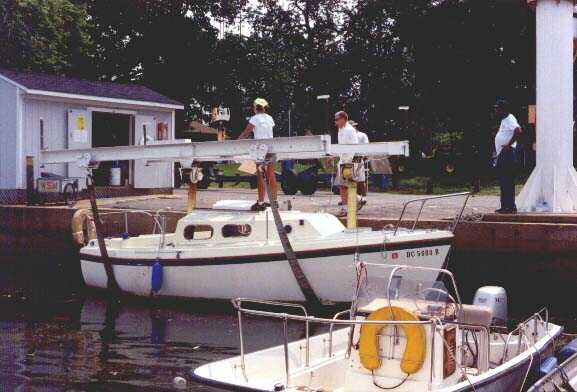
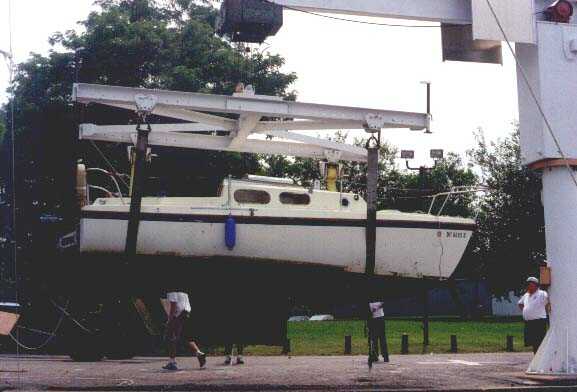
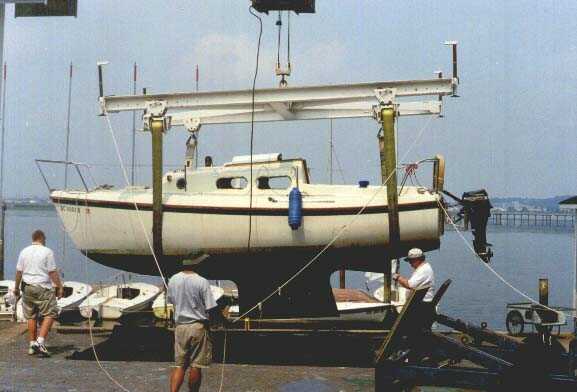
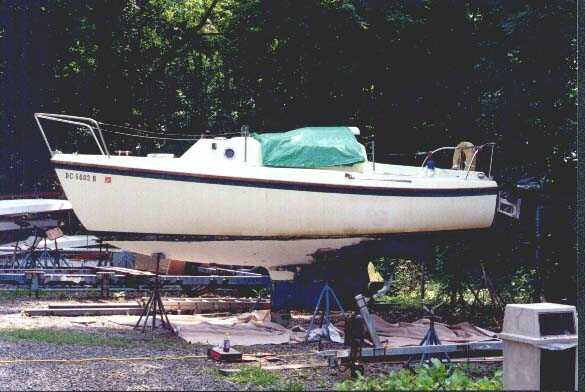
I also wanted to install a through hull speed-log paddle wheel transducer. Some Background I bought the boat from a charitable organization called the SeaScouts. The boat had been donated to them by a gentlemen and they had it up for sale to raise money for their other sailing activities and existing boats. Hence the folks I bought the boat from knew nothing of it's past, and specifically it's maintenance history. When I bought the boat in mid 1998 it was on the hard down at Ft Washington Marina in Maryland, about 10 miles south of Washington Sailing Marina (WSM) her current home. Late in the summer of 2000 I had her hauled out of the water and moved to the work yard at the back of WSM. At Washington Sailing Marina there is no travel lift. They have a five ton crane. In order to haul a boat the mast has to be unstepped first. I don't have a trailer for TOYOT. The marina has a nifty adjustable trailer thought has hydraulically adjustable arms with poppit pads to adjust and carry any boat. They used it to move me from the crane area back to the workyard. Work can be done at the crane if you only need a few days. I expected to spend two months. The Bottom - Part One There were a number of visible blisters on the bottom but a lot were in the paint, not the gelcoat.
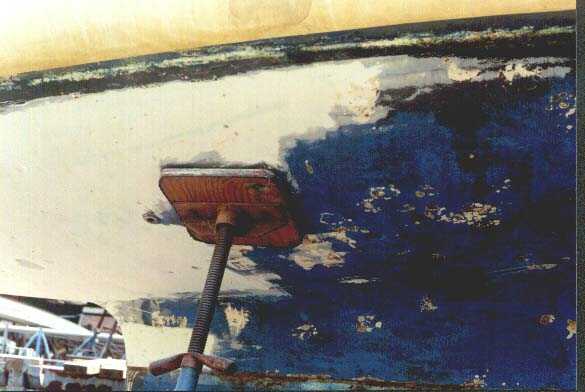
Not knowing the history of bottom work on the boat I bought a 7 inch angle sander and a large stack of 60 grit disks and removed all the bottom paint. This was difficult work as there were quite a few coats of bottom paint. It's also a bit tough to work at some of the angles to do the bottom of the boat while holding up and controlling a big powerful angle sander. Especially with a bit of Arthritis. If you let it get away from you it can remove a remarkable amount of fiberglass very quickly.
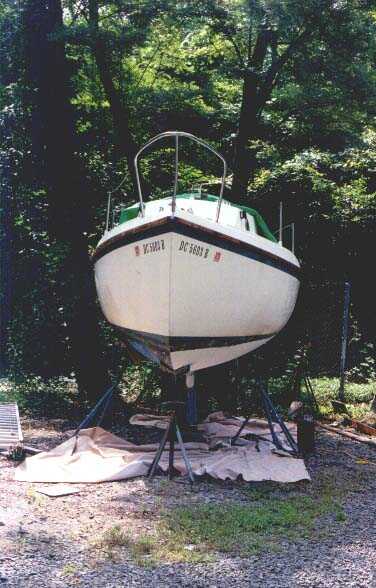
I wanted to get down to the fiberglass so I could see where I stood blister wise. It turned out the boat had few really deep blisters, and a assortment of lesser ones. There were just a few areas with 'pox', lots of small closely spaced blisters in the gelcoat. Most of the pox were not visible until I removed all the bottom paint. I ground out all the blisters and watched the brownish fluid burst forth as I went. I feathered out the edges so as to provide a good bond to the repair material. The sanding & grinding took the better part of three weeks, mostly after work. I then washed the bottom with TSP and lots of rinsing. To really dry the glass it's recommended one wash it with fresh water several times which I did over the first few post sanding days. To give the bottom at least some drying time I switched my attention for a while to the hull above the water line, up to the rub rail. ( The "Topsides") Topsides Preparation I started my work on the topsides by measure the width of the boot stripe below the rub rail. It had chalked to a very dark blue, almost black. I taped off the water line so I'd know where to recreate that.
After removing registration stickers and such I sanded the boat down with a 5" orbital sander and 220 paper.I then went to work with 3M filler and fairing material. This is a two part mix like using epoxy with a thickener, but it dries ready for sanding in only 30 minutes. You can see the large blue spotch from the large repair I mentioned needed to be done. I filled all the gouges and nicks with this stuff and most only took one coat. The large unfair area on the side of the boat got done in several layers, probably about 4. I shaped this area with a long board sander. The one I had was about 6 or 8 inches wide and 30 inches long. It's flexible, has a handle on each end, and has a Velcro face. You but the sandpaper in this size with a Velcro back and stick it on. The board is flexible enough that when you hold it up against the boat it assumes the shape of the hull. This is perfect for reshaping the surface to get it fair again, especially for a repair like this. After each layer of fairing compound I'd sand, water wash, and then wipe down with the Fiberglass solvent to remove all sanding residue. Topsides Preparation The next step was to fill all the crazing and pits or porosity that you could see as visual defects, but were much finer (generally to small to even feel when you'd run your finger over them). The Polyurethane paints are very thin and don't hide any surface defects unlike latex or enamel you use around the house. Since I was going to use Interlux Brightside single part polyurethane paint I wanted to be sure to use their Brightside primer. The Brightside primer doesn't provide much in the way of color coverage, but is designed to hide the crazing and porosity. I did one coat of this, then wet hand sanded with 220 grit, washed thoroughly and wiper with the fiberglass solvent, then repeated with a second coat, wash and wipe. Topsides Painting There are a number of ways to apply paint to a hull.
Topsides painted! Lookitdat shine! 1. Brush it (hard to get even application of paint) 2. Roll it (Not bad with white, if done carefully roller marks aren't too bad, finish ends up with a 'orange peel' texture, but may end up with many small bubbles too.) 3. Spray (Due to extraordinary toxicity of sprayed poly paints, only to be done by pros. No brush marks or roller marks of course. However sprayed poly usually doesn't have the gloss of the roll and tip application.) 4. Roll and Tip (Apply paint by roller to get uniform coverage, tip off with brush to eliminate roller marks. If you develop the knack, this can produce a finish with NO roller or brush marks, and certainly no mistakes that can be seen from more the 18 inches away. Best gloss from this technique.) I elected to use the Interlux paints for a most practical reason. It's what the boat stores near me carry. I decided to use the single part polyurethane. The two part gives a harder more durable finish I read. But you have to mix the two part and fiddle with the ration to get it to be runny enough to level itself out, but not so thin it runs. The single part you use out of the can. This makes touch up easier since you don't have to try to mix a mini batch and that's the primary reason I used it. The paint is VERY sensitive to temperature and humidity, both when you're applying it and as it dries overnight. You don't want the temperature to go below the threshold on the can or have dew form as this will dull the finish or worse.
Don Casey the boat fix up book author recommends painting a dinghy first and I'd heartily agree. It takes some time to figure out the toll and tip process that works for you. When I moved from my test subject to the boat I still had problems initially. The first coat was so bad I sanded it off. I would roll on paint in about a 3 square foot area rolling vertically. Then I'd tip with a good china bristle brush horizontally. I kept getting too much or too little paint on the roller and boat. Too much paint and it would run. Too little and the roller marks wouldn't tip out or the brush would drag and leave brush stroke marks that didn't level out. Finally my able assistant (Mom) and I sat down and went over all the different techniques I'd read, seen in paint company videos, been told by marine store staff, and heard from boaters checking my progress in the work yard. We figured out through some trial and error a process that worked for me. I moved to the stern of the boat and painted just the stern using four different methods, one for each 'quadrant' of the stern. If I were interested in different roller covers, different rolling and tipping directions, etc. I tired them out on the stern on a limited area that was adequate to test but quick to sand down and start over. Here's what I found... Topsides Preparation Trick #1. I was using a 9 inch roller and found that when I loaded the roller up it really had enough paint on it for two or three 3 square foot sections. I always had too much or too little paint. If you rolled more than 3 square feet at a time to try to spread the excess paint, the paint would already be setting by the time you started tipping and the brush would drag and leave marks. I'd get too much paint on the first section, just right in the second, and not enough in the third and then reload. Solution: Switch to a 3 inch roller! I'd load it up, and roll out the paint in a big W, then reroll the area to evenly distribute all the paint in the 3 square foot area. (Less total paint because of the smaller roller). This smaller roller let me get a consistent and correct amount of paint on each section without rolling too big a section.Cool! Trick #2. Paint runs were a problem when I'd roll vertically then tip horizontally. I also had trouble with developing the right pressure (very light) on the brush. I started rolling horizontally, then tipping vertically top to bottom. This meant the horizontal ridges of paint from rolling ran side to side. Then when I tipped down the last motion that touched the paint was downward, and excess paint would be pulled down off the side of the boat to the bottom. The leveling of the paint flowed and leveled downward with the very fine tip brush marks and leveled out horizontally resulting in no roller marks, no runs, and NO brush marks, at all! Trick #3. I did both the rolling and tipping, but had a assistant (Mom) take the china bristle tipping brush from me EVERY time I used it and she cleaned it with the Interlux solvent every single time. This kept the brush from loading up and meant when I tipped the brush strokes in the paint were unbelievably fine, hence they flowed out or leveled as the paint set. One had to move quickly. My Cirrus is only 22 feet but has a lot of freeboard. The waterline to rubrail distance is about 3 feet I'd guess. I did the whole side of the boat in less than 30 minutes per coat. If you move too slowly the paint would already be setting and the brush strokes don't level out. The next day I'd wet sand the entire thing with 220 paper and LOTS of water. Then I'd do a thorough water wash and then a full wipe down with Interlux's thinner, rotating and throwing out the rags every couple of feet of boat. Then paint it again. I did three coats this way. With your nose 12 inches or less from my hull and the light at ANY angle there just aren't but a handful of tiny brush strokes to be seen in two or three spots, much less roller marks. The very small number of imperfections that snuck in aren't visible from two or three feet away. The topsides came out great. Much better than I ever imagined possible, and drew lots of accolades from the gang at the marina. I'm proud to say a few people told me they'd never seen this good a roll and tip job. |